How I Take Photos of my Bikes

Anyone who has watched the GCN Show can immediately point out the errors in my photos below, and I never thought I would say this, but I am a bicycle photo snob in addition to just being a bike snob. I even started an entire instagram page dedicated to photos of bikes (bicyclesnearroads). Let’s walk through what I do to try to get the best photo possible of my bikes.

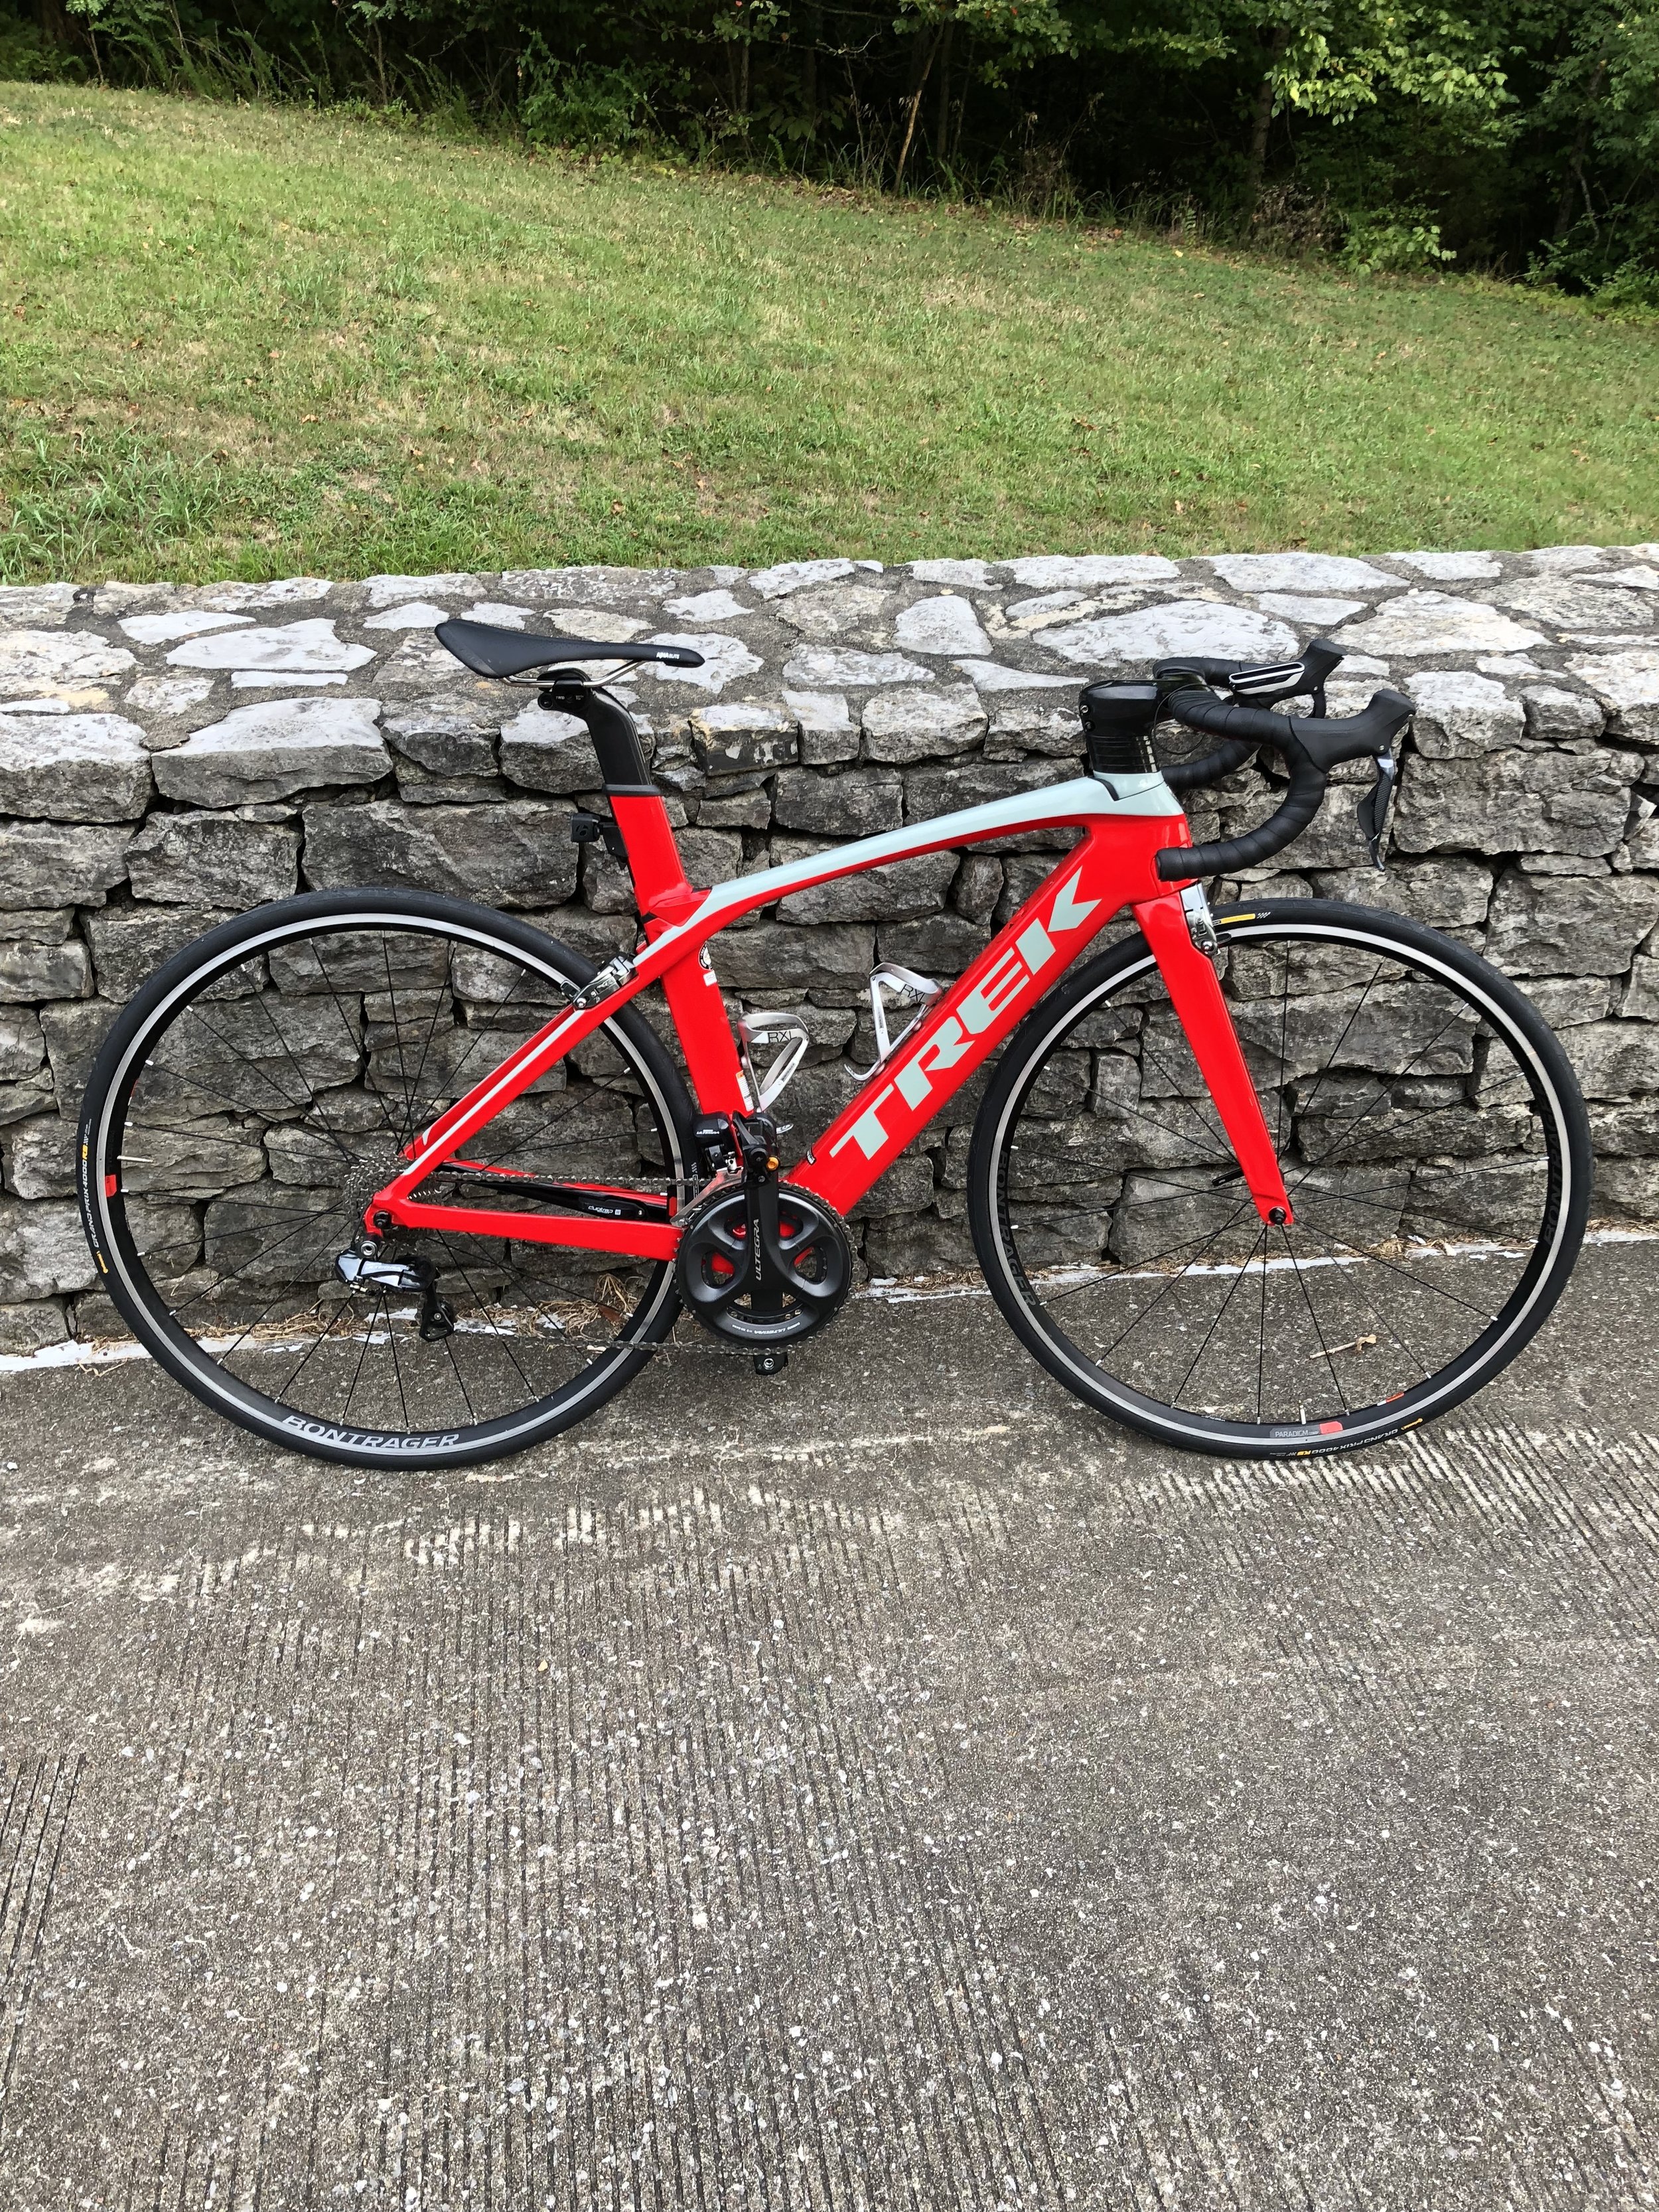
Let’s start with the most basic thing, lighting. When I start a ride looking for somewhere to take a photo of my bike, I am looking for the angle of the sun. There are a lot of fences and walls on my typical route, so I usually figure out which side of the road is going to have the sun facing toward it and use that side to take the photo. I have also found midday is the best time (if it isn’t too hot) because the higher angle of the sun helps to minimize odd shadows. The best sunlight I have probably ever gotten was with my old Madone in the picture on the left.

Once I find the spot and the sunlight, I like to take off my water bottles, because they do typically clash with the look of my bikes, especially if they’re a different color. I always have water with me, but you will almost never see it on my bikes in the photo, except some from before I considered myself a professional bicycle photographer.

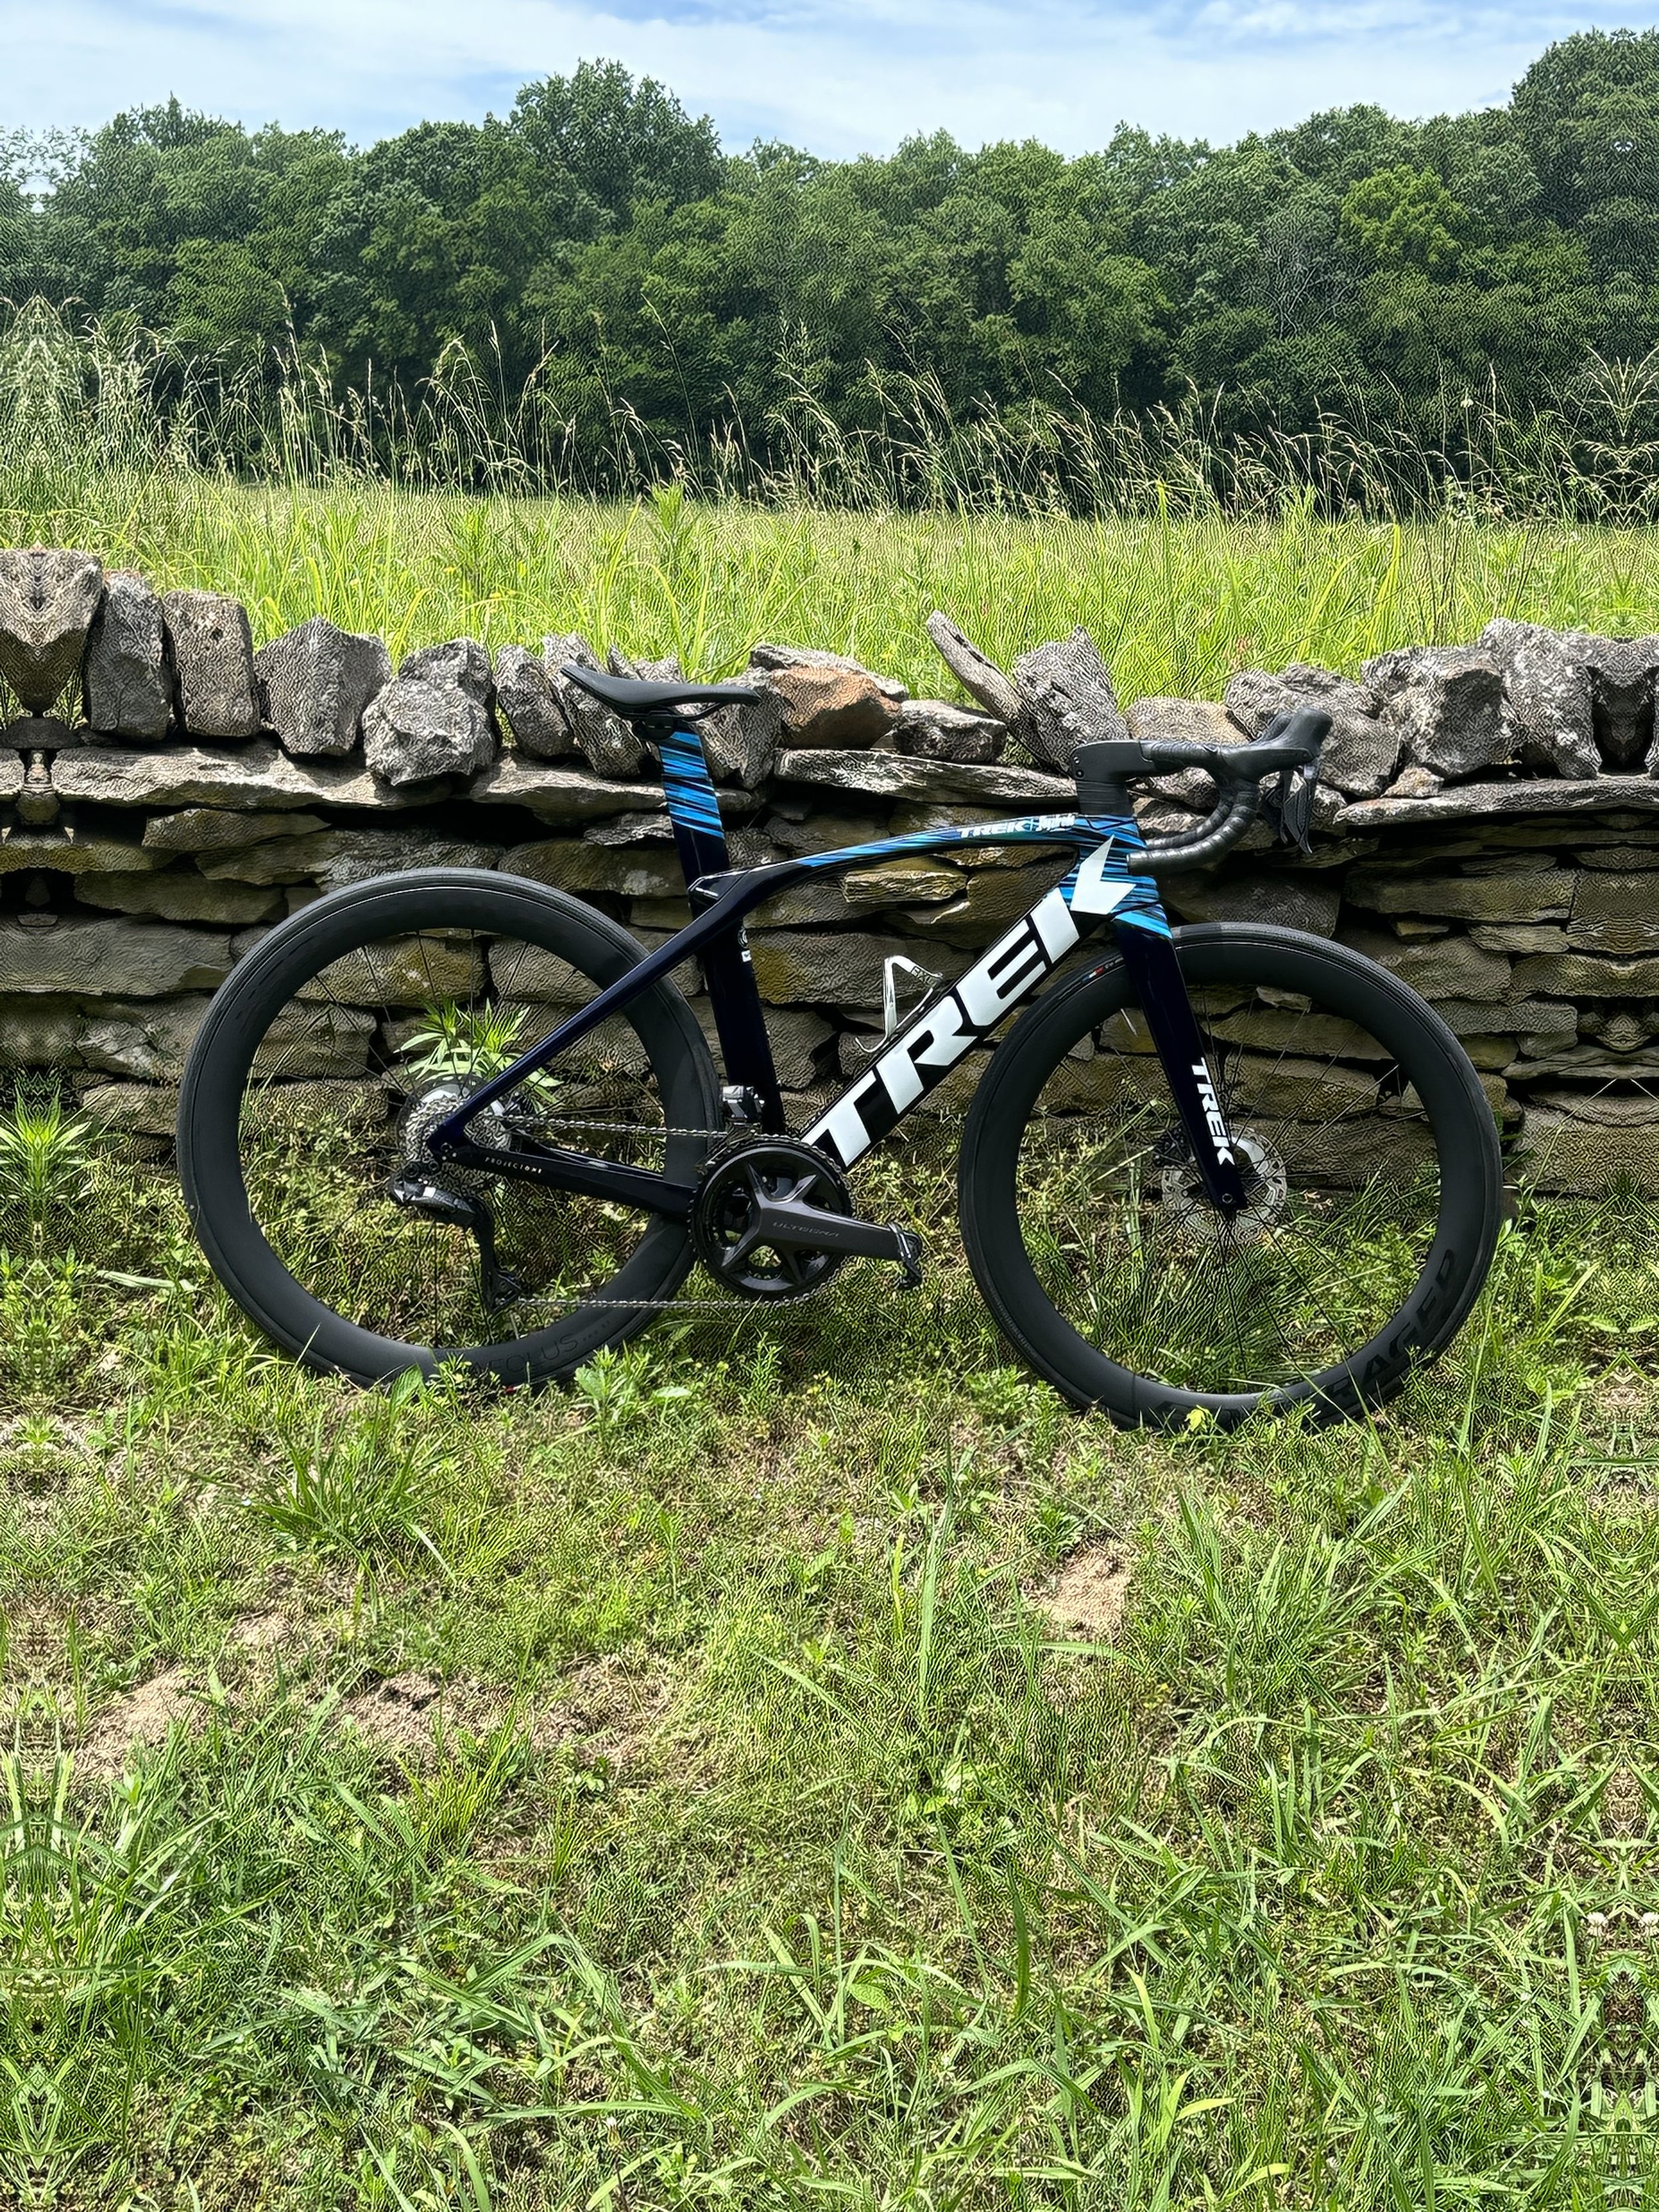
Then, I get into the things you will hear if you’re watching the GCN Show, which include lining up the crank so it is parallel to the ground and making sure the wheels are straight. Another one I have picked up is lining up my wheel logos. My newer try bike has Enve wheels with white logos, and I learned with one of my earlier photos of it that it is difficult to get them right. I also found that the logos on those wheels look best when lined up horizontally.

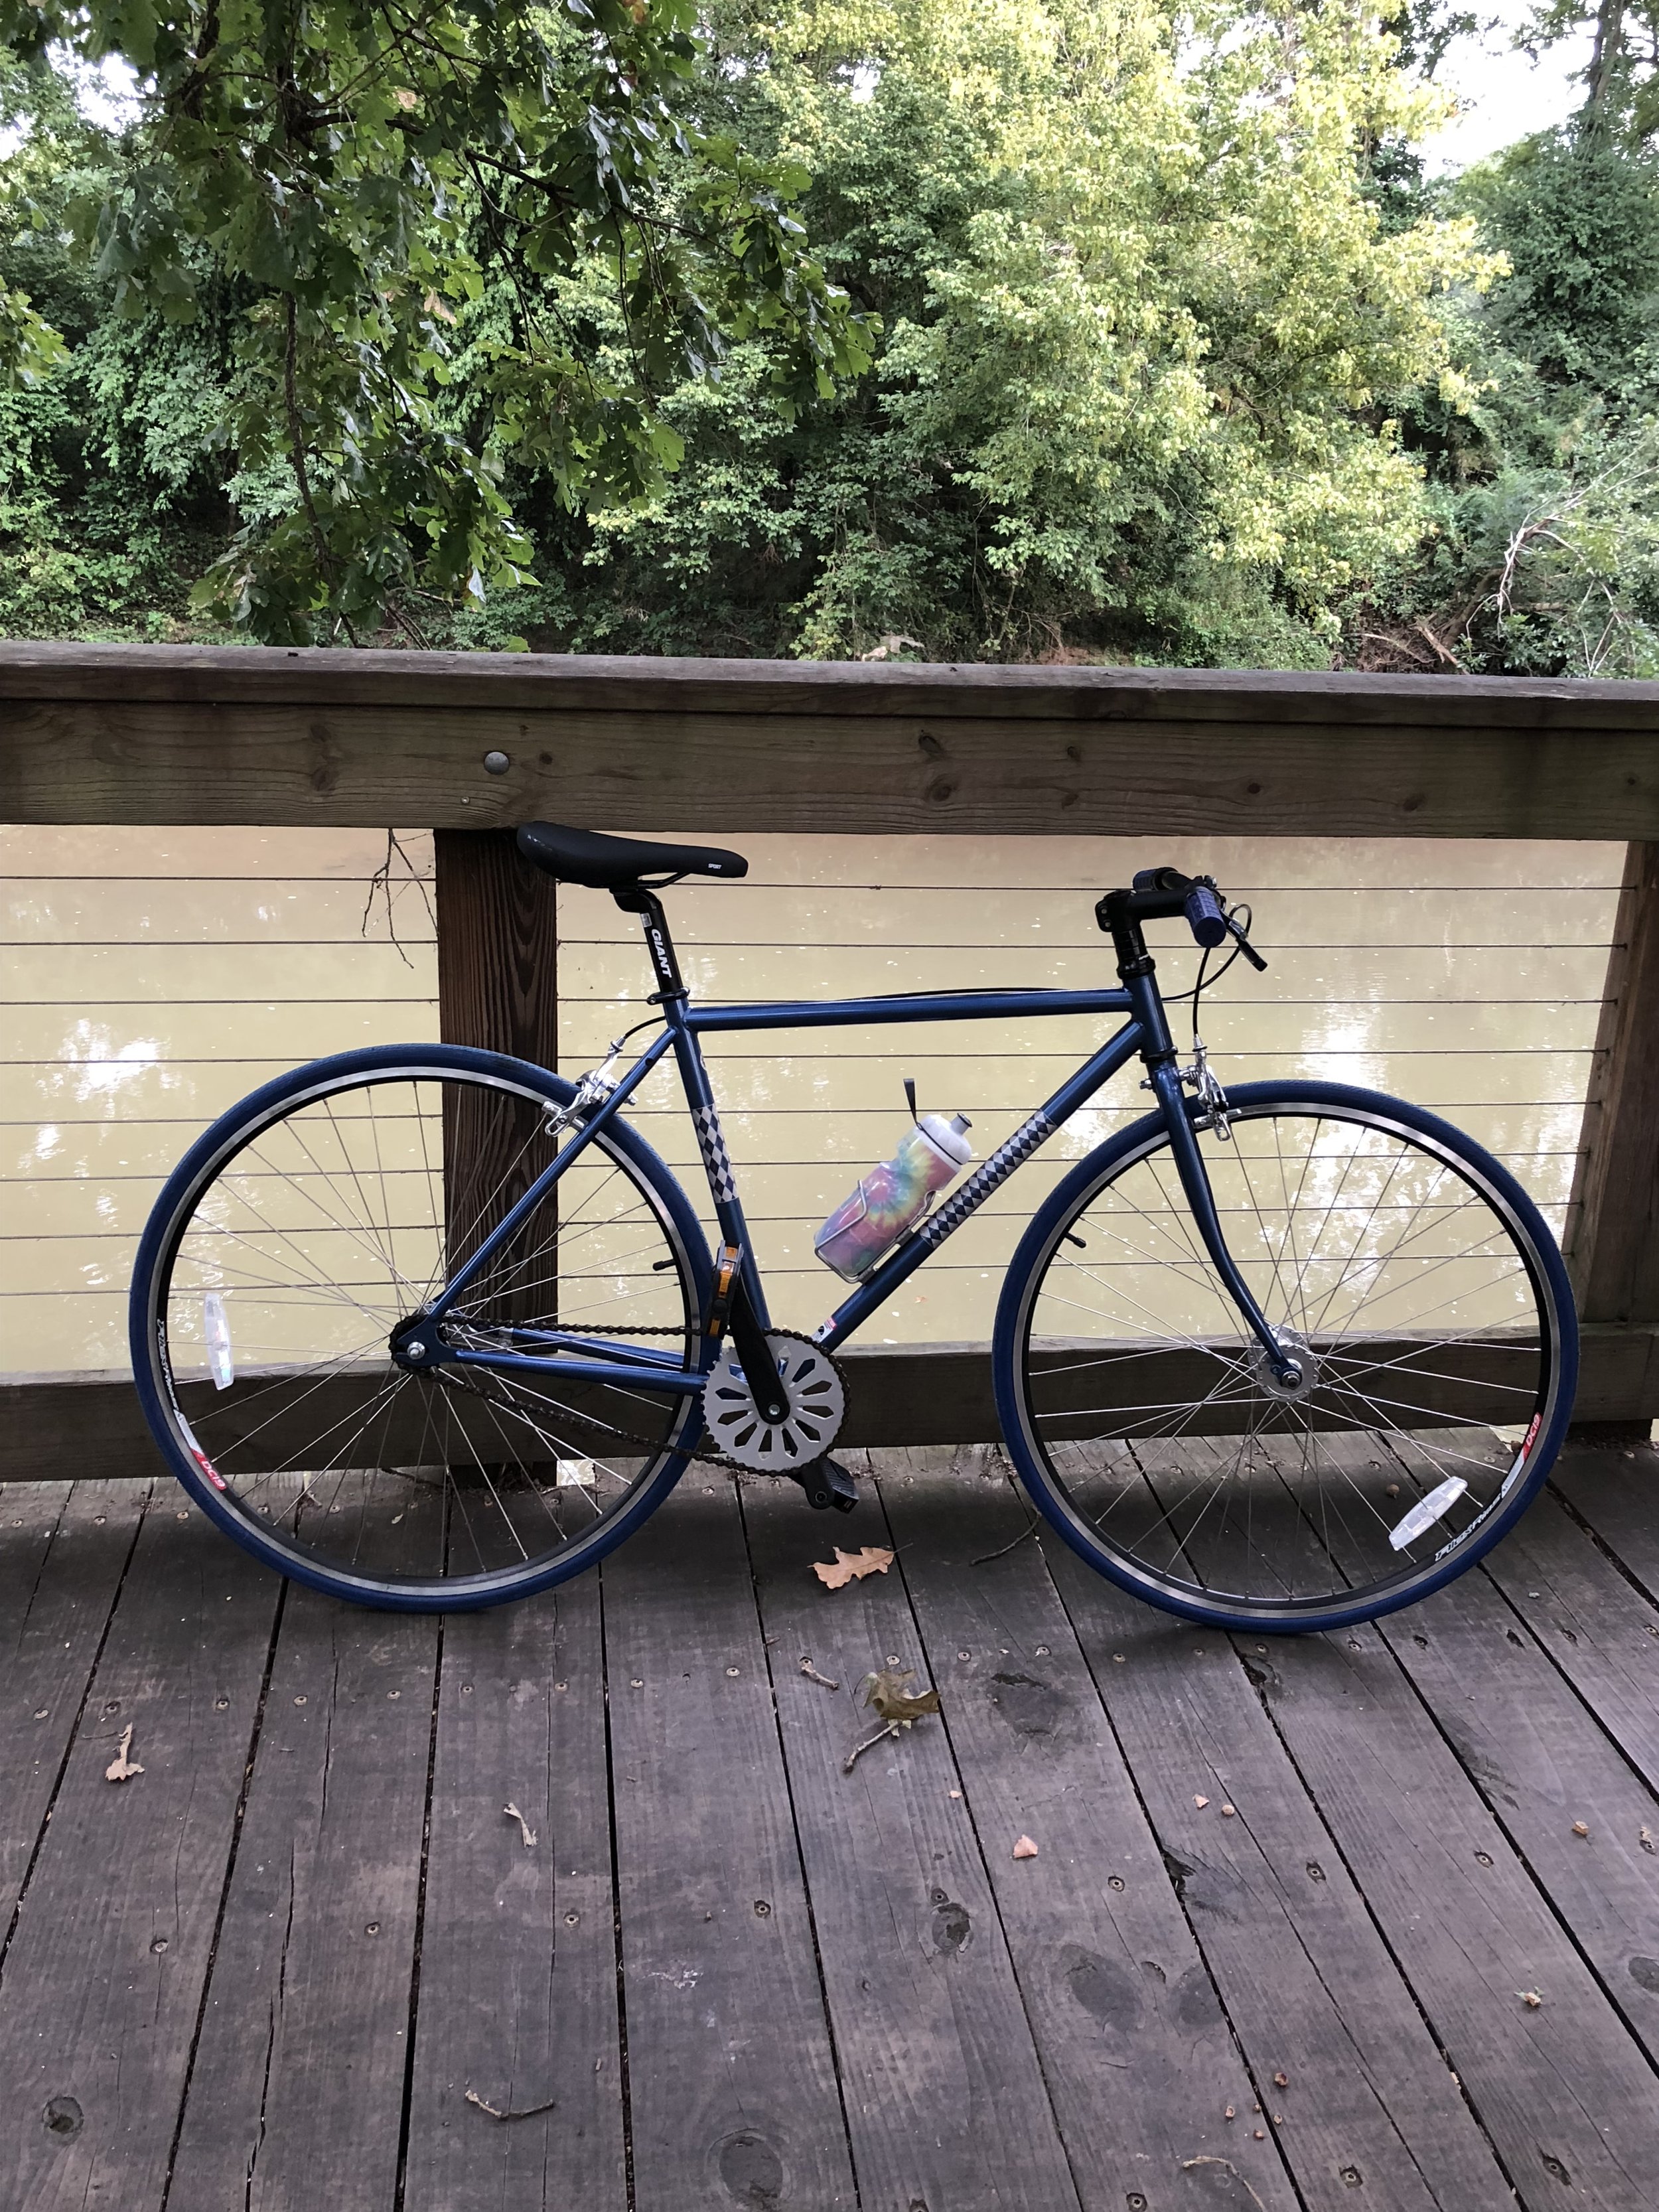
Finally, I like to keep it fun. I have multiple bikes, so I like to get photos of the really nice road bike, and also of the single speed bike I used to get to campus in college (and the cool tie-dye water bottle).

$700 v. $7000 Bike: What is the Difference?

When talking to my husband, I frequently hear how he does not understand my bicycle obsession, because it is just a bike. I understand, because I used to be him. Until I worked in a bike shop, I knew nothing of the different between my 8-speed Claris components and 10-speed Ultegra components and the new 11-speed groups. The only difference I knew was carbon fiber versus aluminum, and for me all that meant was weight savings.

The $700 Bike

IMAGE.JPG

My Trek Lexa purchased in 2012 brand new. It is a full aluminum frame and fork. It had Claris 8-speed components, externally routed cables, and aluminum wheels. This was my dream at the time. I had barely ridden a road bike. it was lighter than the mountain bike I had to ride around campus, and it was purple. It also came with pedals with toe clips and straps.

The $7000 (approximately) Bike

IMAGE.JPG

My Trek Madone. The first bike I bought for myself. It is a carbon frame, fork, steerer. It has lightweight aluminum wheels, Ultegra 11-speed electronic components, and is red, which automatically means it is faster. It is also an aero frame with hidden cable routing.

Where does the $6300 come in?

Carbon Frame & Fork - It is more responsive, stiffer, and absorbs vibration from the road better than aluminum.
11-speed components - The number of gears alone creates smoother shifting. In addition, this system being electronic means I can shift with the click of a button and there is not a long lever throw, especially for the front shift. This makes for faster shifting, especially going up hills.
Lighter Wheels - Another weight saving move. The wheels I have on the Madone are also a little stiffer and have a wider rim, so they fit 700x25 tires better the the ones on the Lexa.
Hidden Cable Routing - I am not talking about just cable routing that is mostly in the frame. I mean you don’t see the cables on this bike. This is not only protecting the cables, but it is also reducing some air drag (although if I shrink myself that does it too).

The Real Question

Does the $7000 Bike Make Me Happier?
I don’t know. I love both bikes. I tell people I will never get rid of my Lexa, because it was my first bike, but I would sell the Madone for the newer Madone SLR 7 Disc, and I would upgrade to carbon wheels, so I guess what I am saying is that you do get something for your money, but there is nothing that can beat the feeling of having something that is yours and allows you to feel as free as I did on that first bike. I have upgraded some parts of course like any good bike mechanic would on the Lexa.

Cycling Accessory Essentials

Depending on where you ride and what type of bike you have, you will have certain accessories you need. 

Things Everyone Needs

Helmet - You only have one brain, so you should protect it.  All helmets sold in the Us should meet certain standards of safety, but I always recommend one with MIPS in it, which protects your brain in a rotational impact by absorbing extra energy.

Lights - You need to be seen.  At a minimum you need a tail light that has multiple flashing and steady modes.  I recommend rechargeable lights, because they can be brighter than battery powered.

Road ID - Even if you ride with other people all the time, they don’t know your allergies, emergency contact, or any other relevant conditions in case of an emergency.

Flat Kit - You don’t want to be that friend who always needs a tube or a tool.  A well prepared rider will always have a flat kit with a tube, tire levers, CO2, and a multi tool.

Floor Pump - I have had to change flats and then sell someone a pump, because they didn’t know to air up their tires every time they rode.  Proper tire pressure is extremely important to your ride and not getting flats.

Things Roadies Need

Trek Madone 9 Series

Shorts or Bibs - I will admit I didn’t give in to this for a while, and I wish I had earlier.  Proper riding shorts makes a huge impact in your ride quality, especially on a road bike.

Jerseys with pockets - I say pockets, because they’re extremely convenient.  I always put my phone in a plastic bag and put it in my jersey pocket in case of an emergency.

Bottle Cages - I put this under road, because on a mountain bike people often use a hydration pack.  You need to be drinking a lot so you do not end of dehydrated when riding.

Short Finger Gloves - Not for everyone, but a lot of people like short finger padded gloves to relieve extra pressure.

Things Commuters Need

IMG_3314.JPG

Fenders - If you are commuting you may run into rough weather more than others.  Fenders can help to keep excess water off you and your clothes.

Rack - A rack can be useful for adding a bag or panniers to carry work and keep it off your back.

Bags - As mentioned above, bags carry things so you don’t have to.  They also have waterproof bags to protect electronics and chargers.

Soap - Anything you need to be clean and smell good to your coworkers.

Things MTB Riders Need

IMAGE.JPG

Hydration Pack - As mentioned with roadies, hydration packs can be useful for mountain bike riders, where some full suspension bikes don’t even have bottle cage mounts.  This is so you have adequate hydration and control.

Knee/Elbow Pads - Protection.  Not necessary for everyone, but useful the more aggressive you ride.

Shorts - Just like the road bike, shorts can be important on the mountain bike.  Some people prefer baggy shorts for extra protection with a liner short for cushion and to prevent chafing.

Jerseys - On a mountain bike, your jersey and whether it has pockets or possibly longer sleeves is your choice.  Longer sleeves and a looser fit can be protection and comfort with the movement of mountain biking. 

Long Finger Gloves - Again the theme of protection, because long finger gloves can protect in falls and from passing branches and other items.